- Knowledge Centre
- Gensolve Enterprise Manager
- Administration
-
Gensolve Enterprise Manager
- Accounting
- Administration
- Videos
- Appointments
- Banking & daily takings
- Billing & payments
- Clients
- Clinicians
- Conditions & medical notes
- Front office
- Gensolve API
- Healthlink
- Internet connection
- Letters & Templates
- Products
- Reports
- Troubleshooting
- Working with files
- Web portal
- Custom forms
- HICAPS
- Installation & troubleshooting
- Medicare
- Online payment
- Telehealth
- Third party integration
- Tyro
- Workcover
- The Workspace
- Managing Conditions
- Using the Support Centre & Accessing Information
- Setting up your Organisation
- Payments
- managing and billing
- Main Form
- Banking and receipts
- Business
- Debtors and Creditors
- Payroll
- GPM Web Booking Portal
- processes
- Sending Emails From GPM
- Hints & Tips
- GPM Start-Up Training
- ACC
- Contract
- Built-In Reports
- GPM_Light
-
Gensolve Practice Manager
-
Release Notes
-
Gensolve Audio Enterprise Manager
Customise Graphics
Your company logo can be uploaded to GPM and displayed on the splash screen (when GPM is opened) and on the invoice header (used on printed invoices).
The graphics should be in the ".png" format with dimensions 344 by 88 pixels for the splash screen and 700 by 124 pixels for the invoice header.
However, there is also an Auto Resize feature that attempts to format the image to the correct dimensions.
Customise Organisation
- Go to Administration >> Customise Graphics
- Choose from the options of Organisation
- Choose the Image type
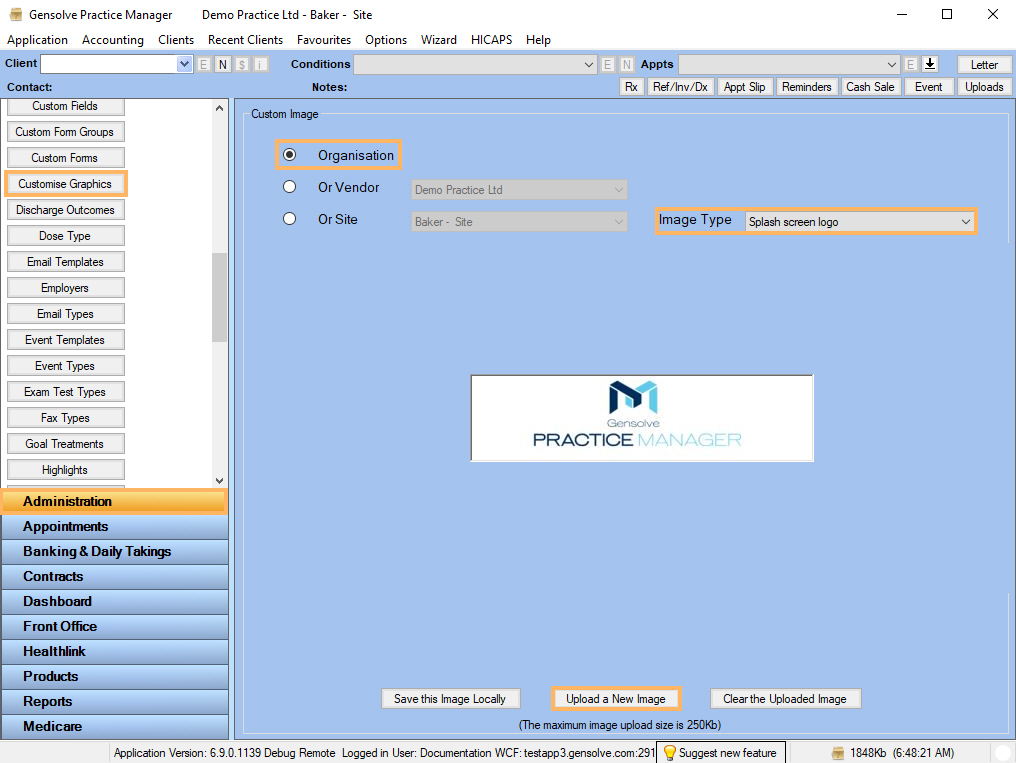
- Click Upload a New Image
- Select your image and click Open
- Please note the Auto Resize checkbox and the Select Image Position
- Click Save.
Customise Vendor
- Go to Administration >> Customise Graphics
- Choose from the options of Vendor
- Choose the Image type
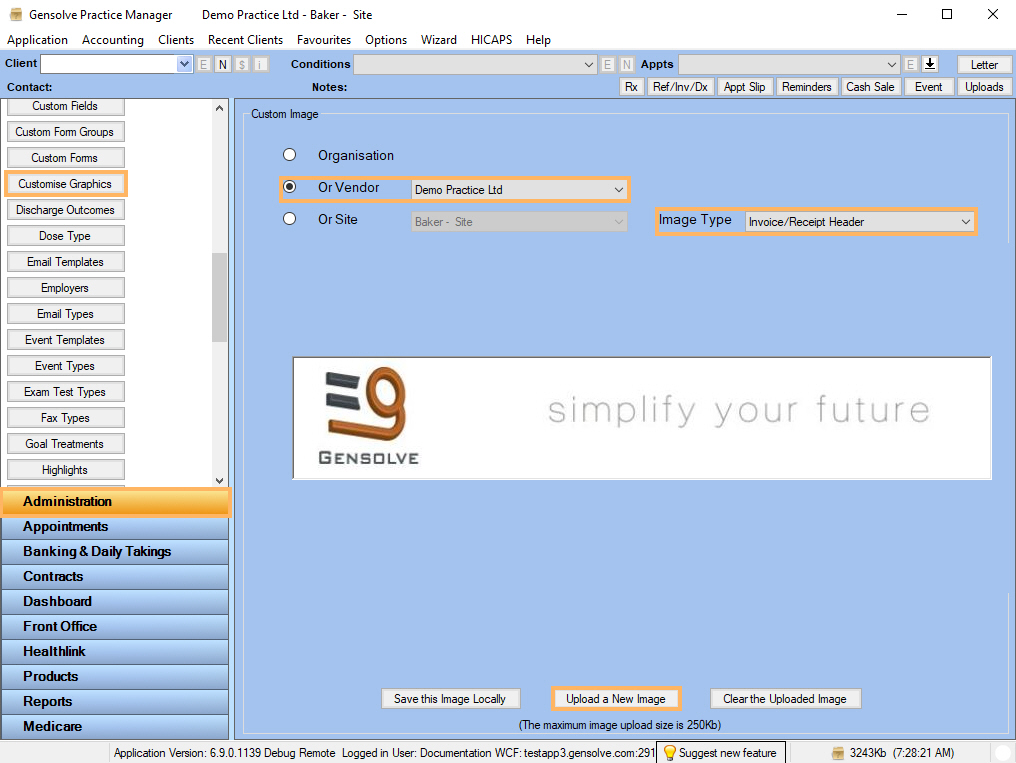
4. Click Upload a New Image
5. Select your image and click Open
6. Please note the Auto Resize checkbox and the Select Image Position
7. Click Save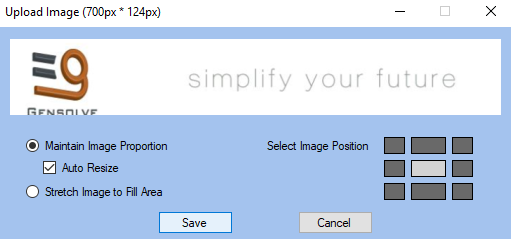
Customise Site
- Go to Administration >> Customise Graphics
- Choose from the options of Site >> Select a Site
- Choose the Image type

4. Click Upload a New Image
5. Select your image and click Open
6. Please note the Auto Resize checkbox and the Select Image Position
7. Click Save